Showing posts with label stamped. Show all posts

Thursday, February 8, 2018

Inspire...hearts

Sometimes we need to be inspired...I'm hoping this little tutorial will inspire you to make a sweet hanging heart!  It would be cute in valentine colors too!

It is really very simple. 
Here is a heart template....or you could draw your own heart shape. 
The ribbons I used are just a clump of seam binding ribbons tied together.
I love stamping out words and sayings...the sky's the limit.
You could personalize so easily!
This heart would make a great sachet.
--------------------------------------------------------
Sweets for the sweet.....
This is quick and easy....so fast and fun...this has been a best seller for me.
Finished design measures: 5" x 7". 
This sale is for this week only...until next Friday.
------------------------------------------------------------------------------


Happy Weekend!!


Monday, January 4, 2016

Mini embroidery hoop pendants

Hello!
It's finally the new year!
Did you have a good holiday?
I did...soooo busy....so it is good to be back to normal.
My daughter has opened up her new etsy shop:
She makes the wooden pendant blanks above.
I stitched up some designs....which will be a pattern soon! 
She is a senior in high school and will graduate this June.
She cut these wood pendant blanks..which are perfect for framing embroidery designs.
This "Paris" one is for sale...a sweet vintage fabric with the word paris. 
This one she made says "Cutie" 
Another is a drawing on muslin...just in time for Valentine's day. 
When you buy any of her pendant blanks...you get a "How-to" sheet and this "Hello" pattern design above.
She made this one with a paper flower. 
She didn't want to sell this...but she can make another for herself....lol.
This design will be part of my pattern... 12 designs in one. 
There will be a deer, some Christmas, valentines, a birdie, pumpkin, and many more.
Some designs will have the capability to put initials or letters in them...you will see.

Gotta get to work on it!
Come visit my daughter's new shop!
Her Photography shop is Peacock Gumdrop


Come to Home matters!!  Come to the Pin me Linky party!

Friday, December 21, 2012

Celebrate...the earth is still here!

 
It's freebie Friday again!!!!  I bet you all are soooo busy finishing up getting ready for the holidays.
Seems to be lots of parties to go to...I am not exactly a party animal...but I shall live it up.
I guess the earth is still here.....lol. 
The freebie is for the new years....and I was just getting used to it being 2012.....dang!
Hope you have a fun weekend and celebrate the blessings you have..I do!

Friday, October 12, 2012

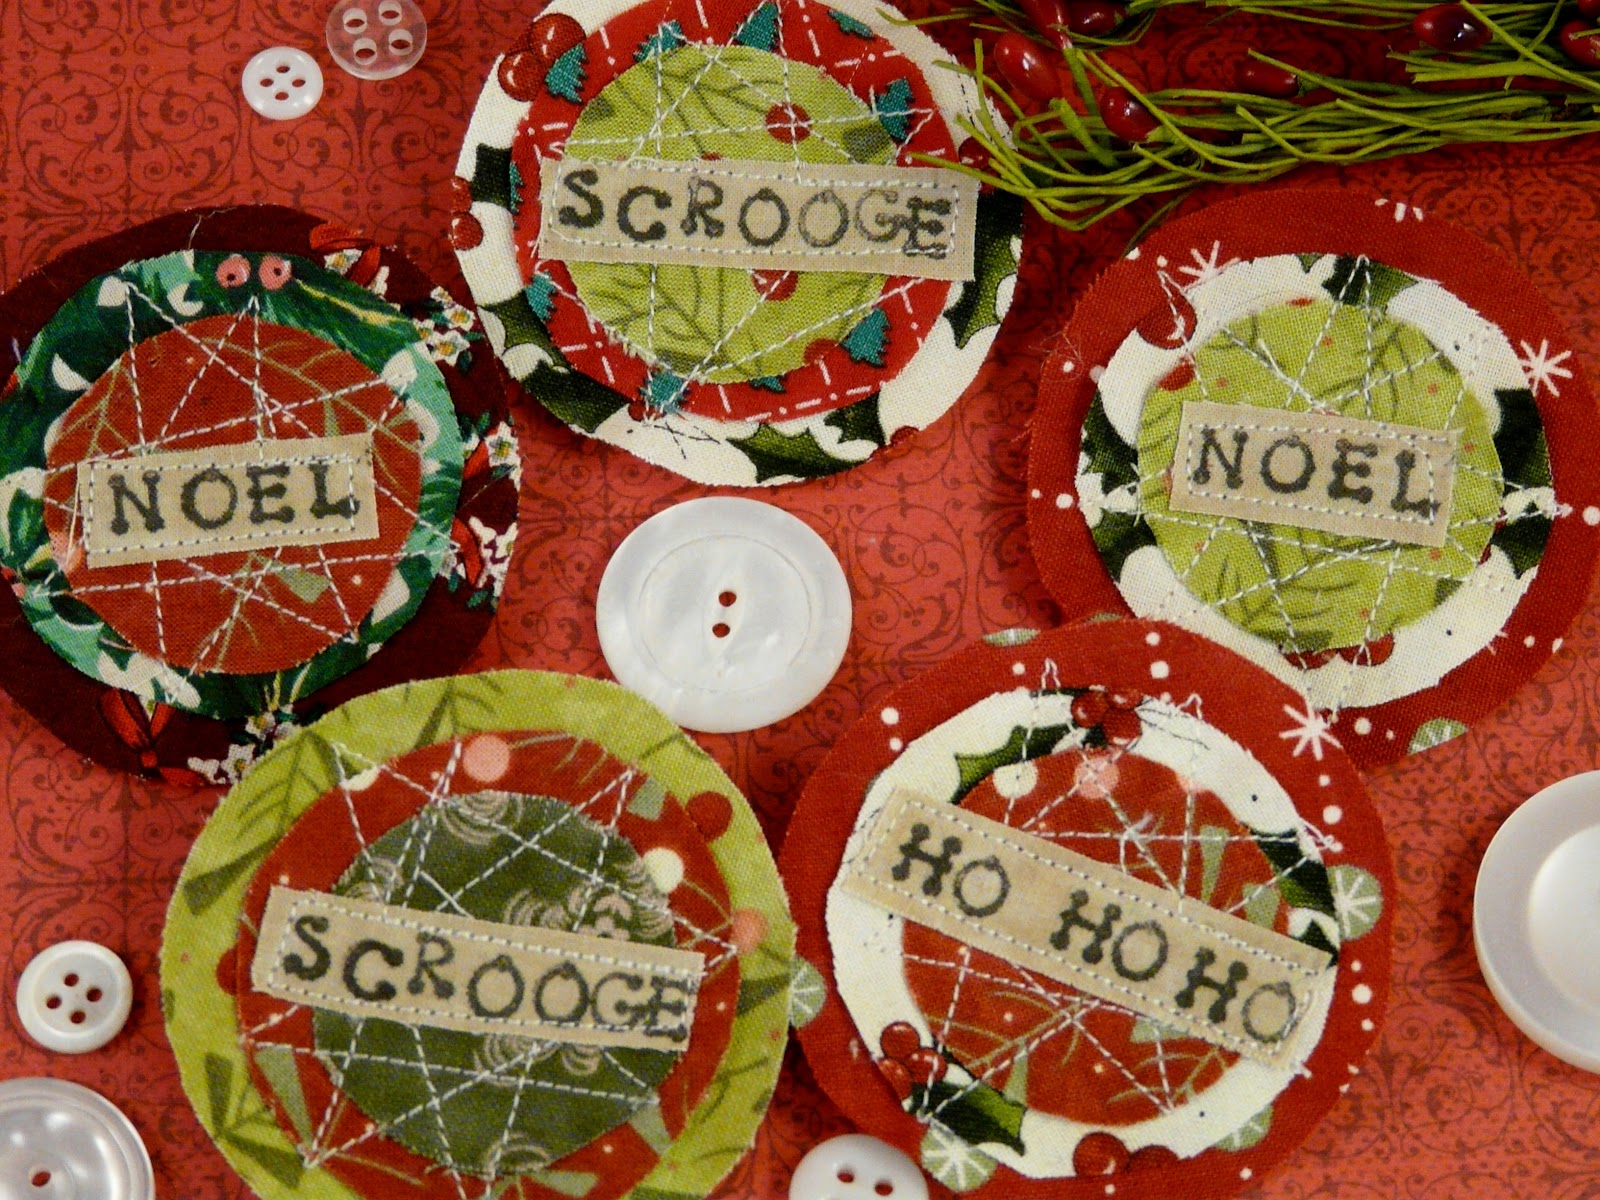
Scrappy Fabric Circle Pins Tutorial

It's Freebie Friday!!! 
I wanted to share this Tutorial I made.....Scrappy Fabric Circle pins.
This is a great way to use up your sewing and quilting scraps! 

Make pins for every season...like Christmas! 
Plus you can make pins for any occasion or just for inspiration.  These would also make great magnets or ephemera for scrap booking pages.

You will need small scrap strips of muslin or tea-dyed muslin....alpha stamps (I got mine at Walmart...one dollar for a small set of all letters...look near scrap booking area).

This is a great permanent ink....says not for fabric...but I have tested this alot...no problems.  I got it at JoAnn Fabrics.

There are lots of letters out there...for this project use smallish letters, unless the word is small and simple...like "Boo".

Just ink up your letter stamps and stamp on muslin. 

Stamp lots of sayings for your pins at once....I like to assembly line these.

Here are some of my Halloween sayings and words.

I have circle shapes at the end of this tutorial....you could also use circles around your house....like spools, small bottles/containers, etc....  My largest circle is 2 1/2", Medium is 2" and small is 1 1/2".  I traced my circle shapes onto a manila folder to make a sturdy template.  Cut out a circle from each size.
Stack the circle from largest to small.
I like to see what each pin will look like before I sew it down.  Make sure your word or saying on muslin is cut down close to the stamped letters
Here is one sewn up.

Take your circles only and do some random stitching....I like to do star shapes.

After the circles are sewn together....add your word or saying.  Stitch on edge...around word.

Like this!

Here is another pin in the making...you can see my star shape, but going around in circles are good too. 
I added "Witchy Woman" to this design. 
Cut out a felt circle for back of pin...make sure it is smaller than largest circle.  Glue felt to back of pin and then glue a pinback on the top back. 
Like this! 
These are fun...so simple....so inexpensive, and they are addicting!
This would make a cool gift for our friends, fellow co-workers, and family. 
Let's not forget ...Thanksgiving!
These would be darling on a plate on the Thanksgiving table. 
I love the Christmas ones too...so sweet. 
I love "Scrooge".....and I know a few people who I may have to attach this to and run.

Life is good!  The bright fabric is so cheerful. I have bins of small scraps...that I can't throw away.
I smile at this pin! 
Sweet dreams!  I am going to make some for all the holidays and anytime in between.  You can use these to sell or whatever....its just a simple yet fun idea.

Here are the circles.  Have fun with these....and if you make some..let me see!!!


Come to the party.....Whipperberry's friday flair.

Friday, July 13, 2012

Where bloggers create 2012

Yay!  It is a 4th annual Where bloggers create blog hop....where we can show you all our studios!!!
The lovely Karen Valentine hosts this big party!!!  Go to her blog to see everyone else's studio....so much fun and gives you great ideas!!! 
Let me introduce myself to you....if you don't already know me.
I'm Shirley Hudson of Hudson's Holidays Designs.  I design craft and quilt patterns. My projects range from stitcheries/embroidery, wool projects, pin cushions, wallhangings, quilts, and everything for every holiday. Currently I have over 180 patterns in my line.  I also create art via paintings and digital artwork.  I have the best job in the world, and I am very grateful for it!  My husband and daughter mean the world to me and I love them dearly!
Above is the quilted wallhanging on the passage way to my studio.

This is a cool little shelf I got at a flea market....it is perfect near my mailing center! I did some collage work on the painting on top...."One day at a time".

I love Pom-poms!!! It is almost like candy.

I keep my pins with stamped sayings near by for Mannequin pin cushions.
I keep a printers drawer full of odds and ends near my glue gun....to embellish projects.

Here is a painting I am working on...from an old book page.  It is a trick or treating princess.

I like keeping my fav stamps in a large bowl...handy!

When I am using a paper punch....I keep them organized by putting them in a muffin tin.
I keep my paints in this old shelve from goodwill.

This lil letter organizer is perfect for tags.  I keep my Titanic sculpture my daughter made me on it.  I also have my lil Anne boleyn painting on the top too.

This is hard to see...but it is 4 loaf pans joined together...great for organizing.

I love creating with inexpensive items...like party streamers!  I keep all my colors in baskets.  I like to paper craft alot!

Here is my cubby hole display...chuck full of my junk...I mean stuff!  Here is a large mannequin from my mannequin pattern.

I have so many things around I don't know what to do with it at times.   There are strawberry pin cushions, mice pin cushions, party hats, bowl fillers, etc....

"Life is good" Party hat adapted from my festive party hats pattern.

True love....for kitties.  I like big eyes!

My daughter models my hats....she has big eyes!  She has an art table right next to mine.  She is going to high school this year...yikes!

This is a cigar box covered in old book pages....with a lil Marie Antoinette.

My bloom painting and a love jar.

Here is my idea section...just an old fence with clothespins holding up all my favorite stuff. I had a postcard done of my designs that I sent to lots of quilt shops...worked real well...used vista print...cheap and easy!

More items on my idea fence....I love looking at it.

Here is a fairy like mermaid above my desk....made by my pal Sue Burger.

I have to keep thread at my desk cause I am always sewing up something while my computer fights with me. It is finally winning...going to need a new one soon.

I found his Eiffel tower mug at a thrift store, perfect for pens, brayers, and pencils.
Thread for my sewing machine...I love having lots of color choices.  I keep my light box here to transfer embroidery designs.  

My shelf by my sewing machine has lots of buttons, dolls, a crown, chicks, and threads.

I love this flash card sign I made.

HOOPS... I love framing stitcheries in hoops...so cool!

My mom....she was lovely!

Mr. Winter...I never made him into a pattern...he is one of a kind.

This is a new project I am working on.....not finished yet.

Please click on this link for more pictures of my STUDIO.  Some of my studio really hasn't changed much...so I wanted to link up to the other pictures.  My studio is my whole basement....nice a cool in summer, cozy in winter.
Thanks for stopping by!!!!