Showing posts with label muslin. Show all posts

Monday, December 24, 2018

Merry Christmas gift

Merry Christmas!!
I thought you might like a small gift...some freebie designs 
from me to you!
Just download and trace onto muslin....stitch and have a 
wonderful day!
Set your love free....fun for Valentines.... 
Get your happy on....
Our love is on display. 

Life is crazy good.

Remember to relax, enjoy family and friends...
and take pics!


Monday, November 17, 2014

Under the Mistletoe....

It sure has been frosty for most of us in the U.S.
No snow for us....just cold.
Above is my newest pattern
"Meet me under the Mistletoe"....#343.
Yep....Love is in the air this Christmas. Mr. & Mrs. Frosty have joined hands & found the mistletoe. Such a charming embroidery project....so quick, easy and fun to do. Add color, shadows and glitter... this is simply sweet! Finish the design in a hoop with ribbon bow.

This is a side view.
Cozy up next to the fireside and stitch this sweetie today! This makes a great gift for a special pal, looks great hanging in your home, & also is a fun craft show seller.
Finished design in hoop measures: 10" round
Embroidery design measures: 6 1/2" x 7 3/4"
As you can see....I am a big fan of framing embroidery in hoops.
I get lots of hoops at thrift stores and garage sales.....so inexpensive.
Each of these hoops are different sizes....you just can't tell from the pictures. 
The shamrock is a tiny hoop.....where my new pattern above is in a 10" hoop.
So easy!
-----------------------------
Stay tuned for an announcement soon!!!

Come to Thrifty thursday and pin me linky party!

Wednesday, November 12, 2014

What's stitchin?

What's stitchin?
Well it is embroidery to me.....and I love to embroider.
I thought you might like to see what I am working on right now.
I think it is always good to have something ready to work on. 
I drew out my design...."Candy cane wishes and mistletoe kisses".
I traced my design using a blue disappearing marker and a light box.
In this case I am using an old dish cloth type material found at goodwill. 
I picked out some DMC floss. I was thrilled out of my senses when they sent me every color they had.  They did that because I am a designer and always use their floss.  One thing I love is that the color never bleeds.....ever! 
Her eyes will be filled in with a satin stitch. 
I take even stitches...just a simple back stitch....I like things easy.
It is kinda like doing a puzzle....just fill it in until it is complete. 
This will take me a couple evenings while watching "The Voice" or "Survivor".  Let me tell you....stitchin while my hubby watches the Seahawks is great!  I can still be entertained by the game and stitchin,...plus he loves for me to be with him.  It's a win win deal!

Come to Thrifty Thursday  The party bunch, and the Pin me linky party

Sunday, March 16, 2014

When I can't part with something.....

I made this mannequin this past week.
I fell in love with it!
I was making it to sell, but can't part with it.
It just is so beautiful to me....and speaks to me...so even though I don't need to keep it...I am going to!
It looks old, doesn't it!
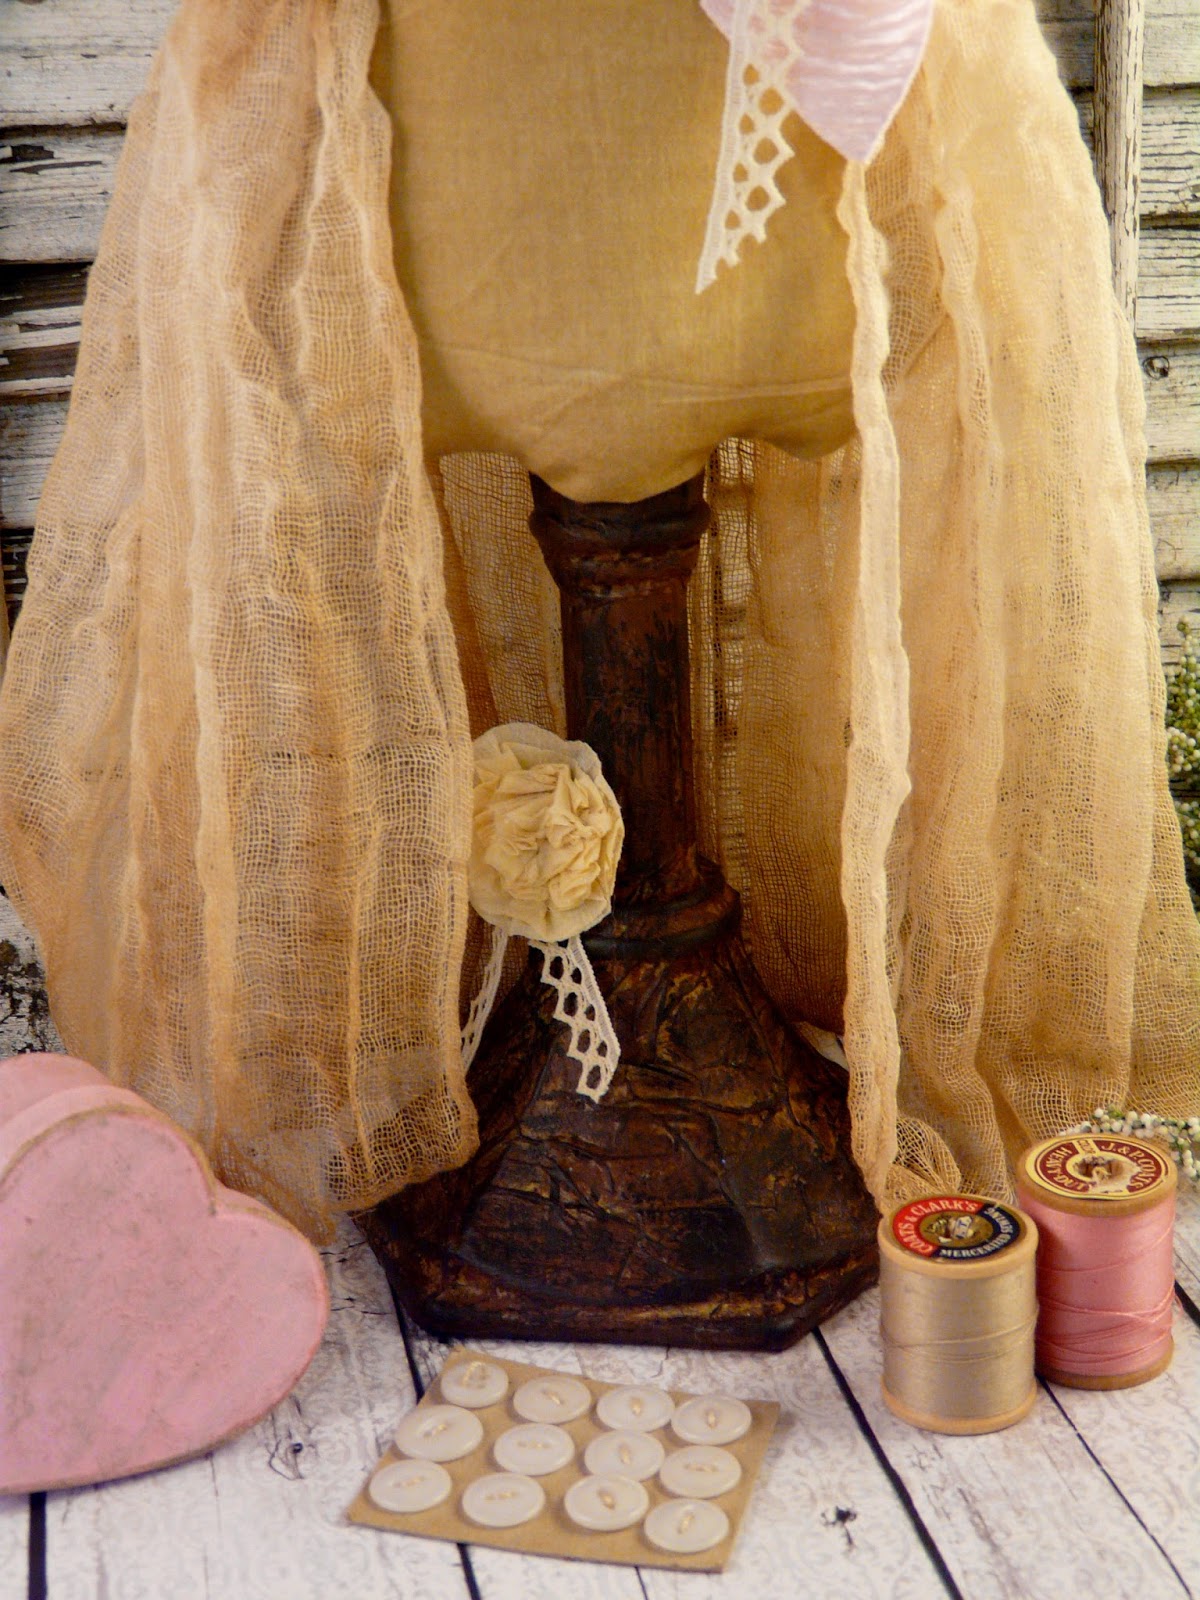
I made it with tea-dyed muslin (already dyed and on a bolt at the quilt shop)....I added a ribbon sash....party streamer flower...lace, and banner that says "Enjoy".
I also added a necklace which is just a bit of chain I had laying around and the pendant is a 1928 brand earring (a loner since I lost the other earring)

I added coffee dyed cheesecloth for her skirt....and put it on her like a Marie Antoinette style skirt...puffy at the sides.

This is a brooch I had in my stash...something I don't want to wear but is perfect for my mannequin.

Here is the glass candlestick stand I changed up (I posted about this early last week)
Now it looks old ...like iron or old leather.  I added a small party streamer flower with lace trims.


This is how the back looks.
She is now going to be at my side in my studio.

This mannequin is my medium size one.

Gather happy memories today!

Come to the Pin me linky party, The party bunch, Pin worthy projects party, Creative connection, and Chic on a shoestring!

Saturday, January 25, 2014

Fun & bright pillowcases...& more


 I am making some new Pillowcases for my 16 year old daughter Selina.  I found some fabulous fabric (tula pink) at a new shop in town...Charming Lulu. 


This is the pattern I am going to do with my new fabric.
--------------------------------------------------------------

 My newest pattern in my Etsy shop and on my patternmart.
It is called...Valentine ...Don't break my heart. #321
 
This heart is protected under a glass dome... but is still vulnerable, like our own heart is. What a fast, easy, and fun design to make. This sweet pillow will look perfect in your home decor! Special tinting and depth secrets included.
Finished pillow design measures: 5 3/8" x 5 3/8"
Embroidery design: 4 3/4" x 4 1/8" 
I think it looks so sweet next my paper mache heart boxes.

Wednesday, January 22, 2014

Valentine sneaky peaks

Sneaky peak time!
I have 2 new embroidery designs coming out in a day or two.
I would love to create Valentine designs for several more months....but I need to move on!
I really get caught up on the pink and red, the hearts, the love, and all! 
This one is soooo darned cute...not modest about this one!
There is something so relaxing about stitching ... it makes me feel good.
By the way....there is a super cute Etsy treasury that I am proud to be in....
It is a beautiful treasury.
It will inspire you to get stitching!
 

Monday, December 30, 2013

I'm in PRIMS magazine...winter 2014

I love being PRIMs magazine again!  These magazines are full of info, ideas, inspiration, fun, and much much more.  All the Stampington magazines are a treasure to keep forever....more like books than magazines!

My sew patriotic mice pillow is in this one!

I have been in over 60 magazines ...I never get over the thrill to see my name in print.
You should try submitting your arts/crafts....the worst they can say is no....but it could be a YES!
I started my whole business by submitting an idea to Country marketplace....and then everything else...like designing my own patterns...came shortly after.

These mice are very naughty....but cute!
The patterns for this is in my Etsy shop, patternmart, or my website(printed patterns)

I share some tips in the magazine....the whole magazine is delightful...and is so inspiring.
They are always at crafts stores and Barnes and noble (my hangout!)

Friday, October 12, 2012

Scrappy Fabric Circle Pins Tutorial

It's Freebie Friday!!! 
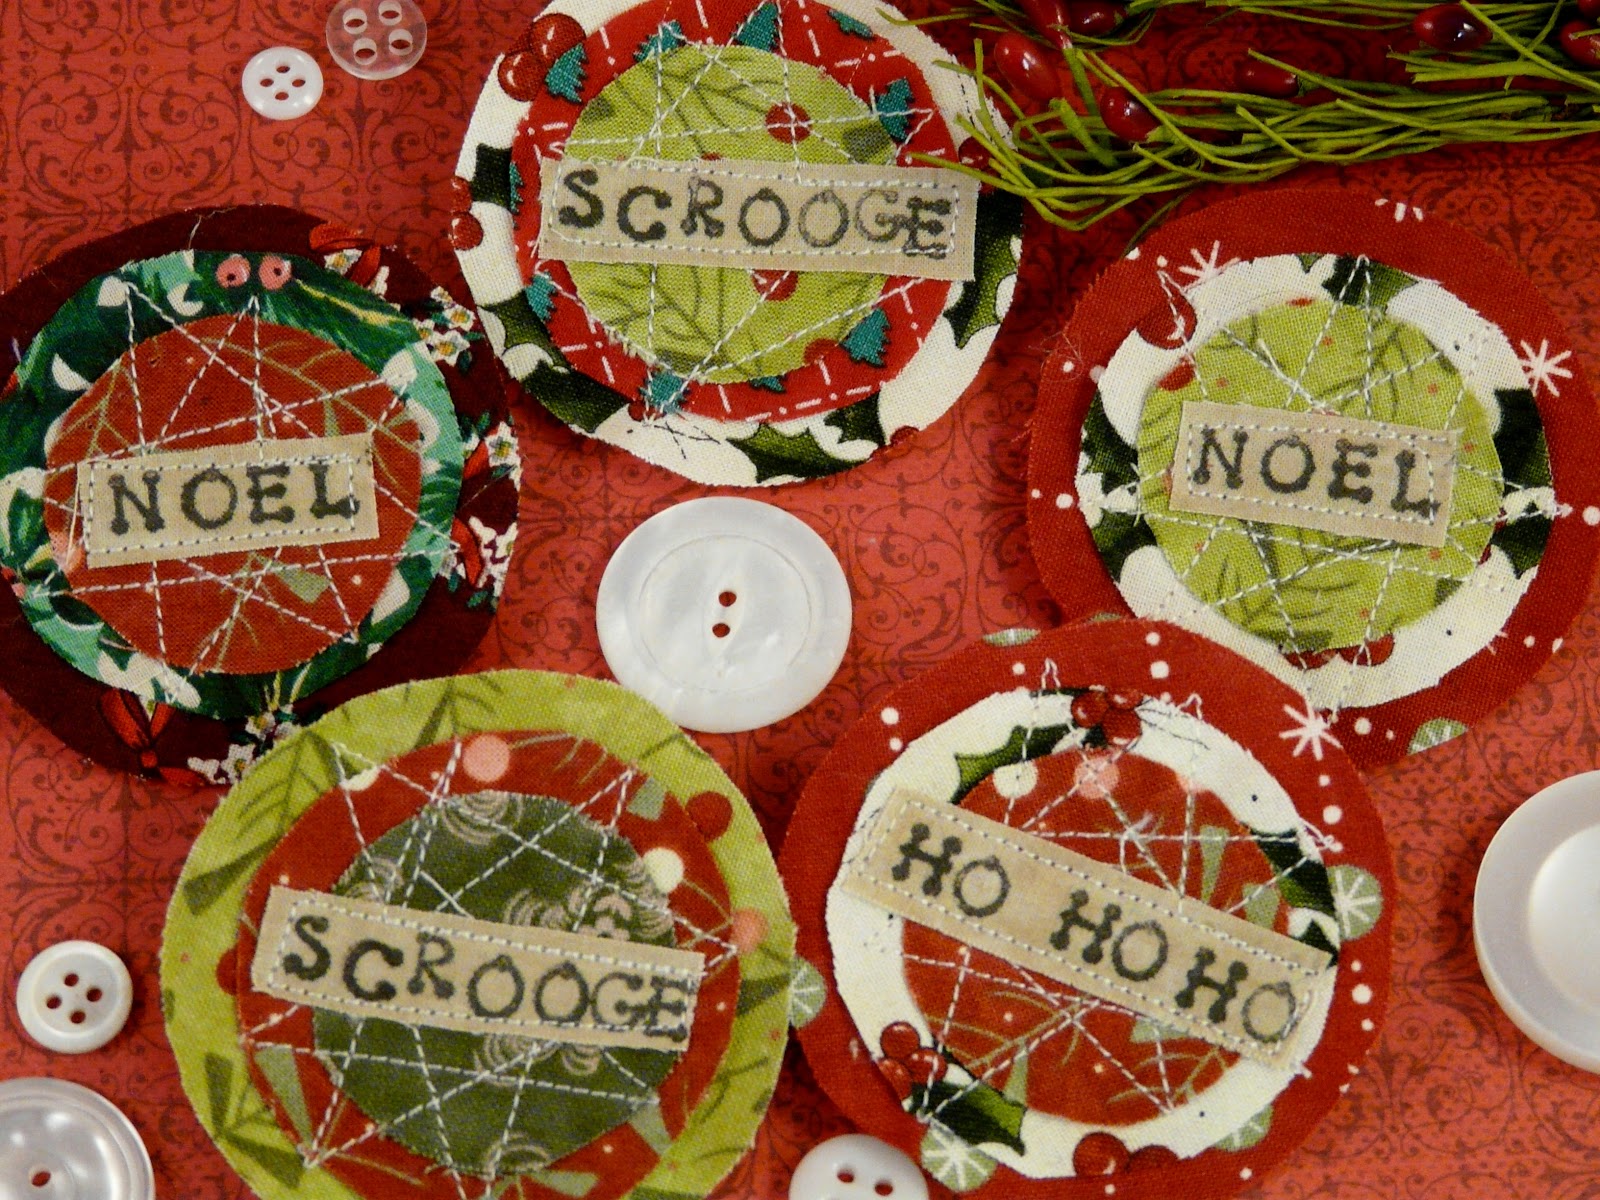
I wanted to share this Tutorial I made.....Scrappy Fabric Circle pins.
This is a great way to use up your sewing and quilting scraps! 

Make pins for every season...like Christmas! 
Plus you can make pins for any occasion or just for inspiration.  These would also make great magnets or ephemera for scrap booking pages.

You will need small scrap strips of muslin or tea-dyed muslin....alpha stamps (I got mine at Walmart...one dollar for a small set of all letters...look near scrap booking area).

This is a great permanent ink....says not for fabric...but I have tested this alot...no problems.  I got it at JoAnn Fabrics.

There are lots of letters out there...for this project use smallish letters, unless the word is small and simple...like "Boo".

Just ink up your letter stamps and stamp on muslin. 

Stamp lots of sayings for your pins at once....I like to assembly line these.

Here are some of my Halloween sayings and words.

I have circle shapes at the end of this tutorial....you could also use circles around your house....like spools, small bottles/containers, etc....  My largest circle is 2 1/2", Medium is 2" and small is 1 1/2".  I traced my circle shapes onto a manila folder to make a sturdy template.  Cut out a circle from each size.
Stack the circle from largest to small.
I like to see what each pin will look like before I sew it down.  Make sure your word or saying on muslin is cut down close to the stamped letters
Here is one sewn up.

Take your circles only and do some random stitching....I like to do star shapes.

After the circles are sewn together....add your word or saying.  Stitch on edge...around word.

Like this!

Here is another pin in the making...you can see my star shape, but going around in circles are good too. 
I added "Witchy Woman" to this design. 
Cut out a felt circle for back of pin...make sure it is smaller than largest circle.  Glue felt to back of pin and then glue a pinback on the top back. 
Like this! 
These are fun...so simple....so inexpensive, and they are addicting!
This would make a cool gift for our friends, fellow co-workers, and family. 
Let's not forget ...Thanksgiving!
These would be darling on a plate on the Thanksgiving table. 
I love the Christmas ones too...so sweet. 
I love "Scrooge".....and I know a few people who I may have to attach this to and run.

Life is good!  The bright fabric is so cheerful. I have bins of small scraps...that I can't throw away.
I smile at this pin! 
Sweet dreams!  I am going to make some for all the holidays and anytime in between.  You can use these to sell or whatever....its just a simple yet fun idea.

Here are the circles.  Have fun with these....and if you make some..let me see!!!


Come to the party.....Whipperberry's friday flair.