

February is here!
I love all the red and pink of Valentines day!
I designed this sweet bunny repeating pattern artwork for this month's calendars.
I had so much fun playing around with it.

---------------------------------------------------------------
Brand new design:

Love is in bloom!
This is my new pattern: Some bunny's in love Embroidery thread painting pattern #417
This is my new pattern: Some bunny's in love Embroidery thread painting pattern #417

This sweet bunny design is easy and uses only a few simple stitches.
Fill in your embroidery using thread painting (short straight stitches). It is very satisfying and fun!
The pattern also includes close up pictures and stitching diagrams.
Embroidery design measures: 4 1/2" x 4 3/4"
Framed in hoop measures: 6" x 6
Fill in your embroidery using thread painting (short straight stitches). It is very satisfying and fun!
The pattern also includes close up pictures and stitching diagrams.
Embroidery design measures: 4 1/2" x 4 3/4"
Framed in hoop measures: 6" x 6
------------------------------------------------------------------------

I made some Valentine ornaments... very much like my Halloween and Christmas ones... sewn and painted.
I kept Linus and Mickey for my tree.

I think he is super cute on my tree.

Here is my tree...filled with goodies!

This is how they look before painting. They are funny looking at this stage.

I have mickey's face base painted.

After lots of painting and pencil work... they are much cuter. I add glitter because glitter makes everything better.
----------------------------------------------------------------------

I wanted to share this little globe pencil sharpener... I covered it with tissue paper and paper hearts to transform it.

Good old mod podge.... my grandma Shirley would be proud.
She would cover sturdy card board boxes with bits of fabric and mod podge.
I still have some of her boxes...they are indestructible.
--------------------------------------------------------------

My daughter Selina got engaged!!! Here is her diamond ring!
It happened on New years eve.

Here is the happy couple. He is a great guy....works hard and treats her like gold.
They don't when the big day will be...after things get better from covid from sure.
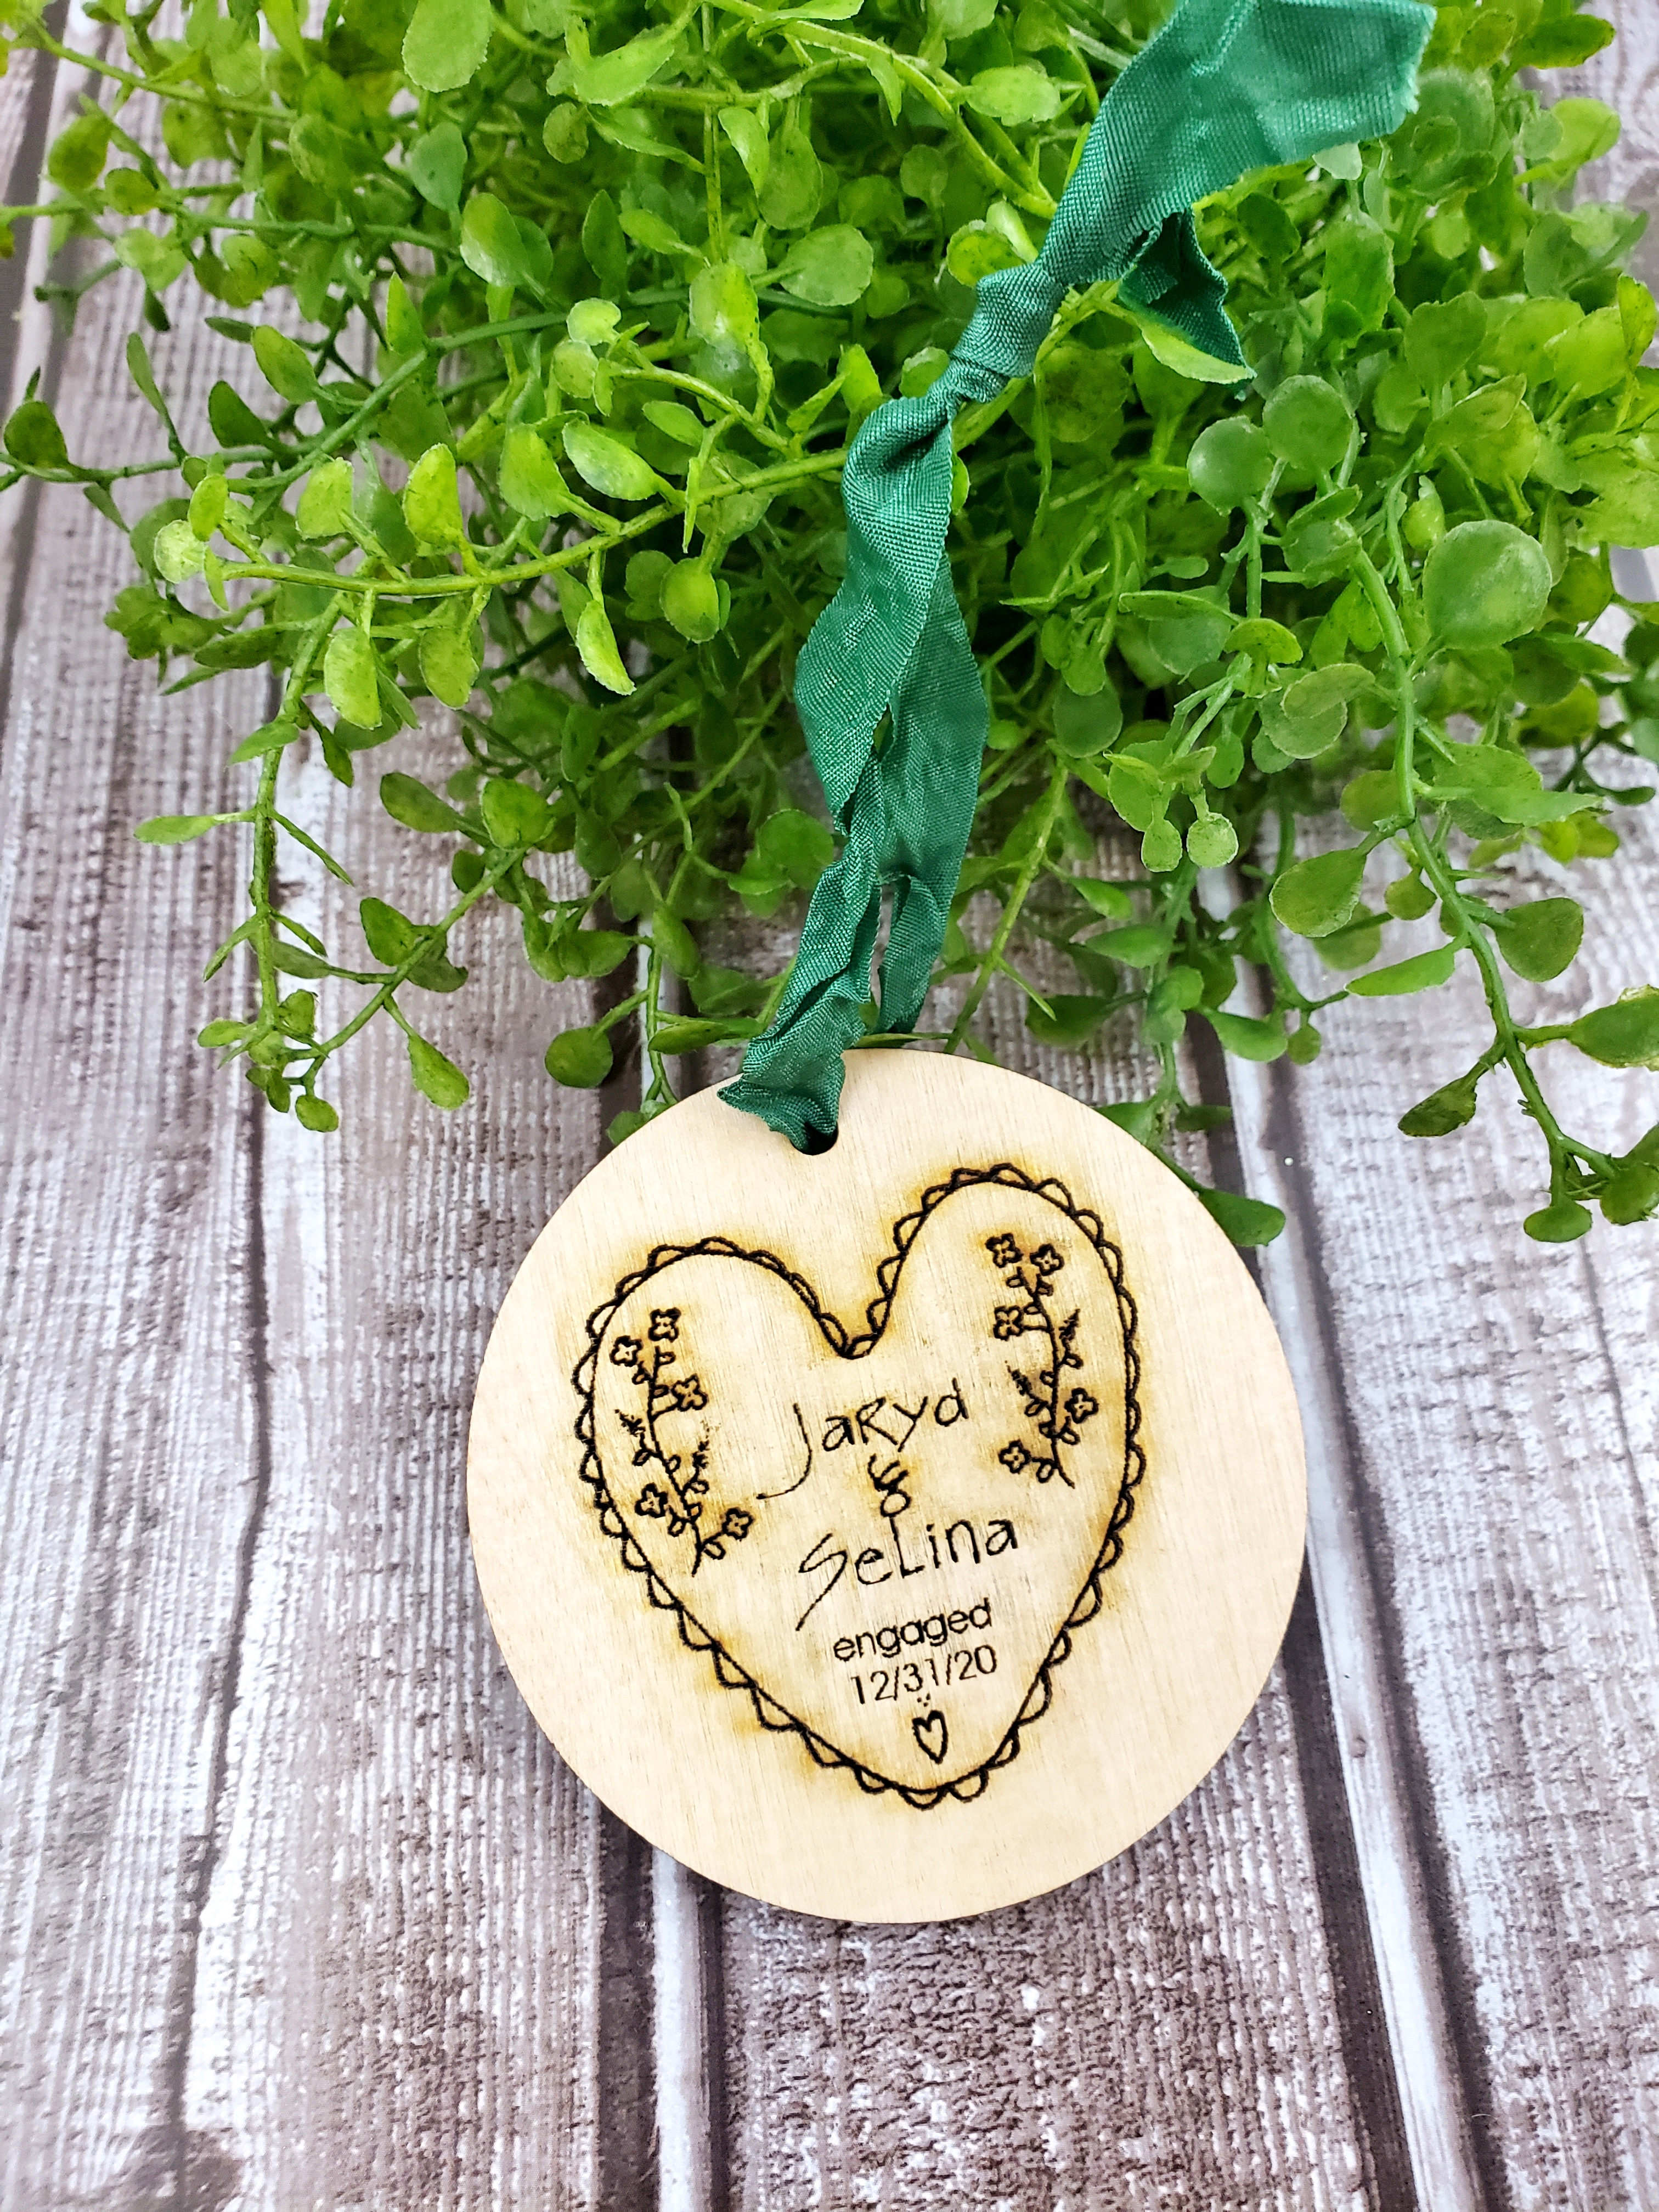
She made a laser cut ornament to commemorate it.
She is going to watercolor some of it to add color.

Here it is a bit closer.

Here is one she did for her cousin. Watercolor is beautiful on it!

Here is another one...cute!
------------------------------------

Celebrate Valentine's day or anytime...with this sweet wood ornament.

Here it with alittle watercolor painting. It is just blobbed on...easy.
-----------------------------
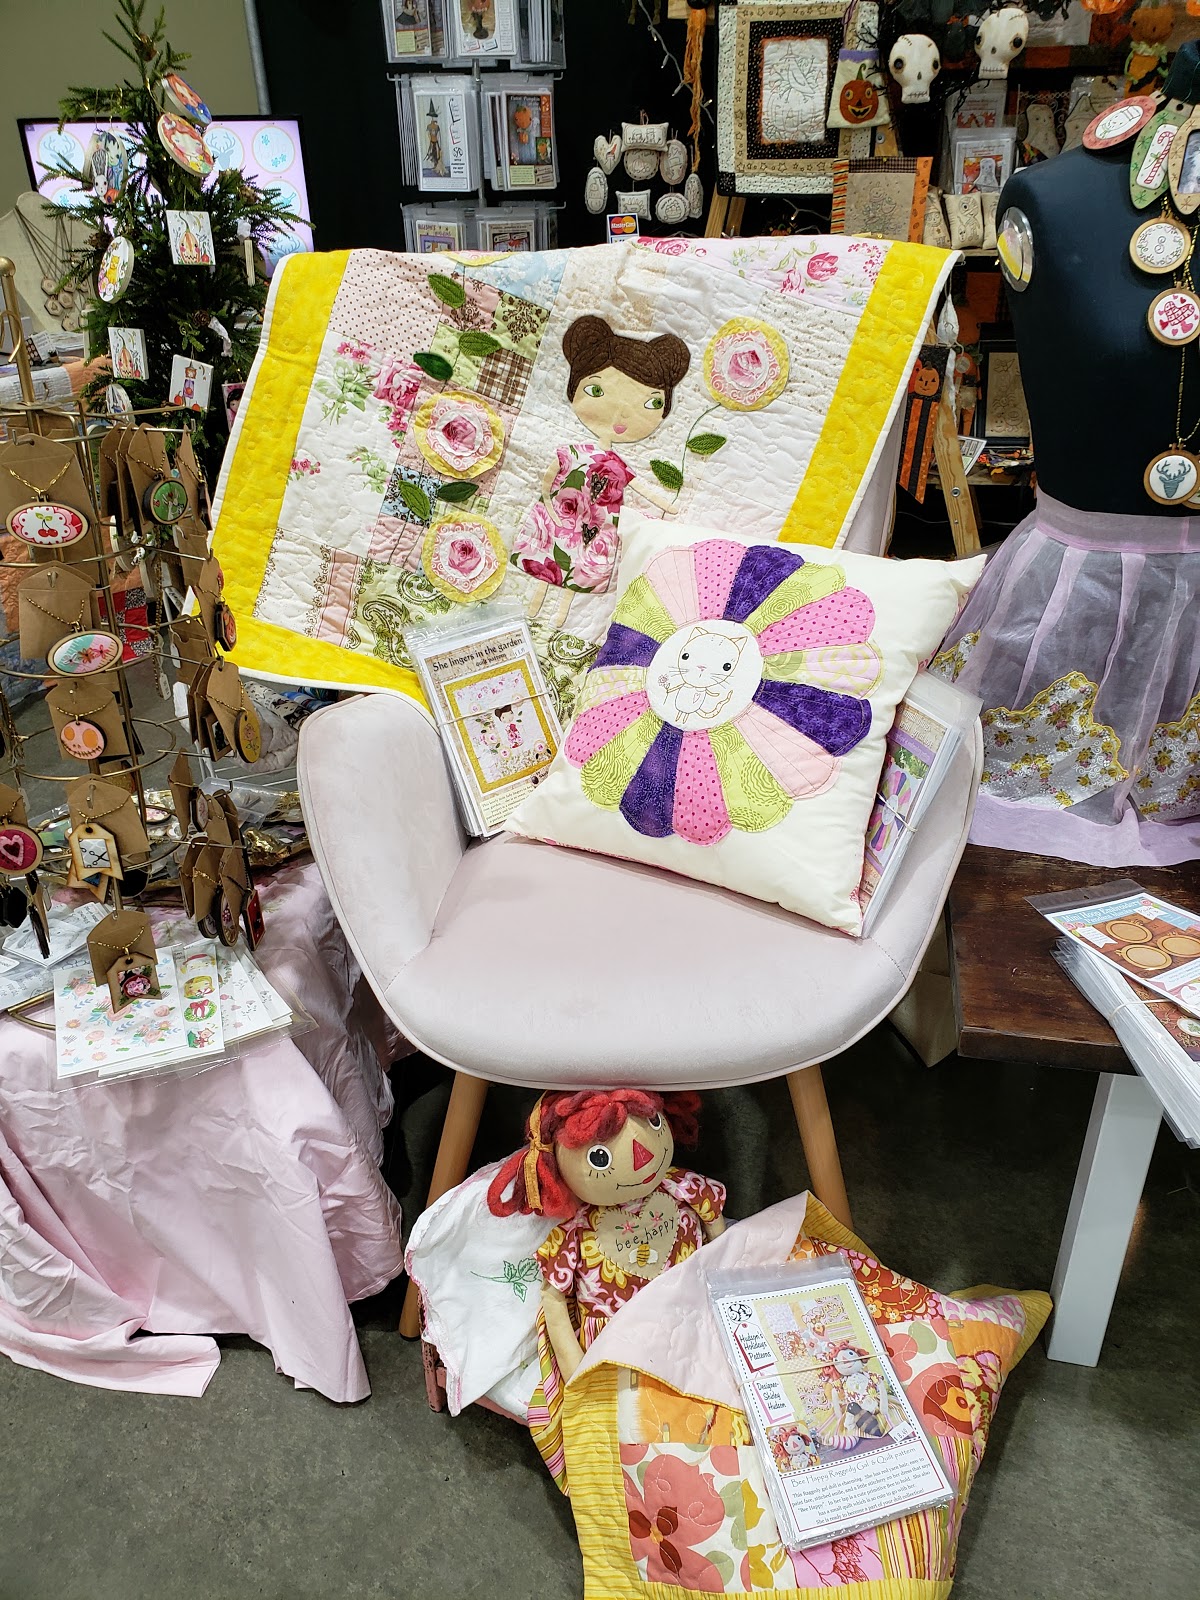
Selina created larger hexies...

These ornament sized Hexagons are just the perfect way to finish an embroidery design and makes the sweetest gift!
In this listing you get 2 ornament blanks.....the wood hexies that Selina created.
In this listing you get 2 ornament blanks.....the wood hexies that Selina created.

****With this purchase you get the "Pot of flowers" embroidery pattern design and a special "how-to" sheet.

Each one is 3 1/2" Tall and 3 3/4" Wide.... Then the inside (embroidery fits in here) 2 1/2" tall x 3".
Each ornament blank is plain wood but can be painted (watercolors work great!) Add a ribbon to hang or a wire hook.
-----------------------*****-----------------------
I made a mug rug for right by my Recliner chair...I usually have coffee or water by my side all the time.
I thought you might like to make one for yourself.

I used valentine fabric for this time of the year.

The largest area has fabric with special features... like these kitties....which I sewed a heart around them to define them as the center of attention.

Cute right!

I drew a quick diagram.
Use a 1/4" seam allowance. Sew the featured fabric next to 3 strips of Valentine fabric.
Press well. Sew 1" strips all the way around. It is a good idea for the fabric border strips to be the same as the backing fabric. It makes the strips resemble quilt binding. Cut excess fabric and press. Layer batting and backing fabric (slightly larger than top) then lay top over backing (right sides together). Pin in place. Sew 1/4" around mug rug leaving a 3" opening. Turn inside out. Sew opening closed. Quilt heart on featured fabric and also quilt down strips and around the borders.
------------------------------------------------------------------------
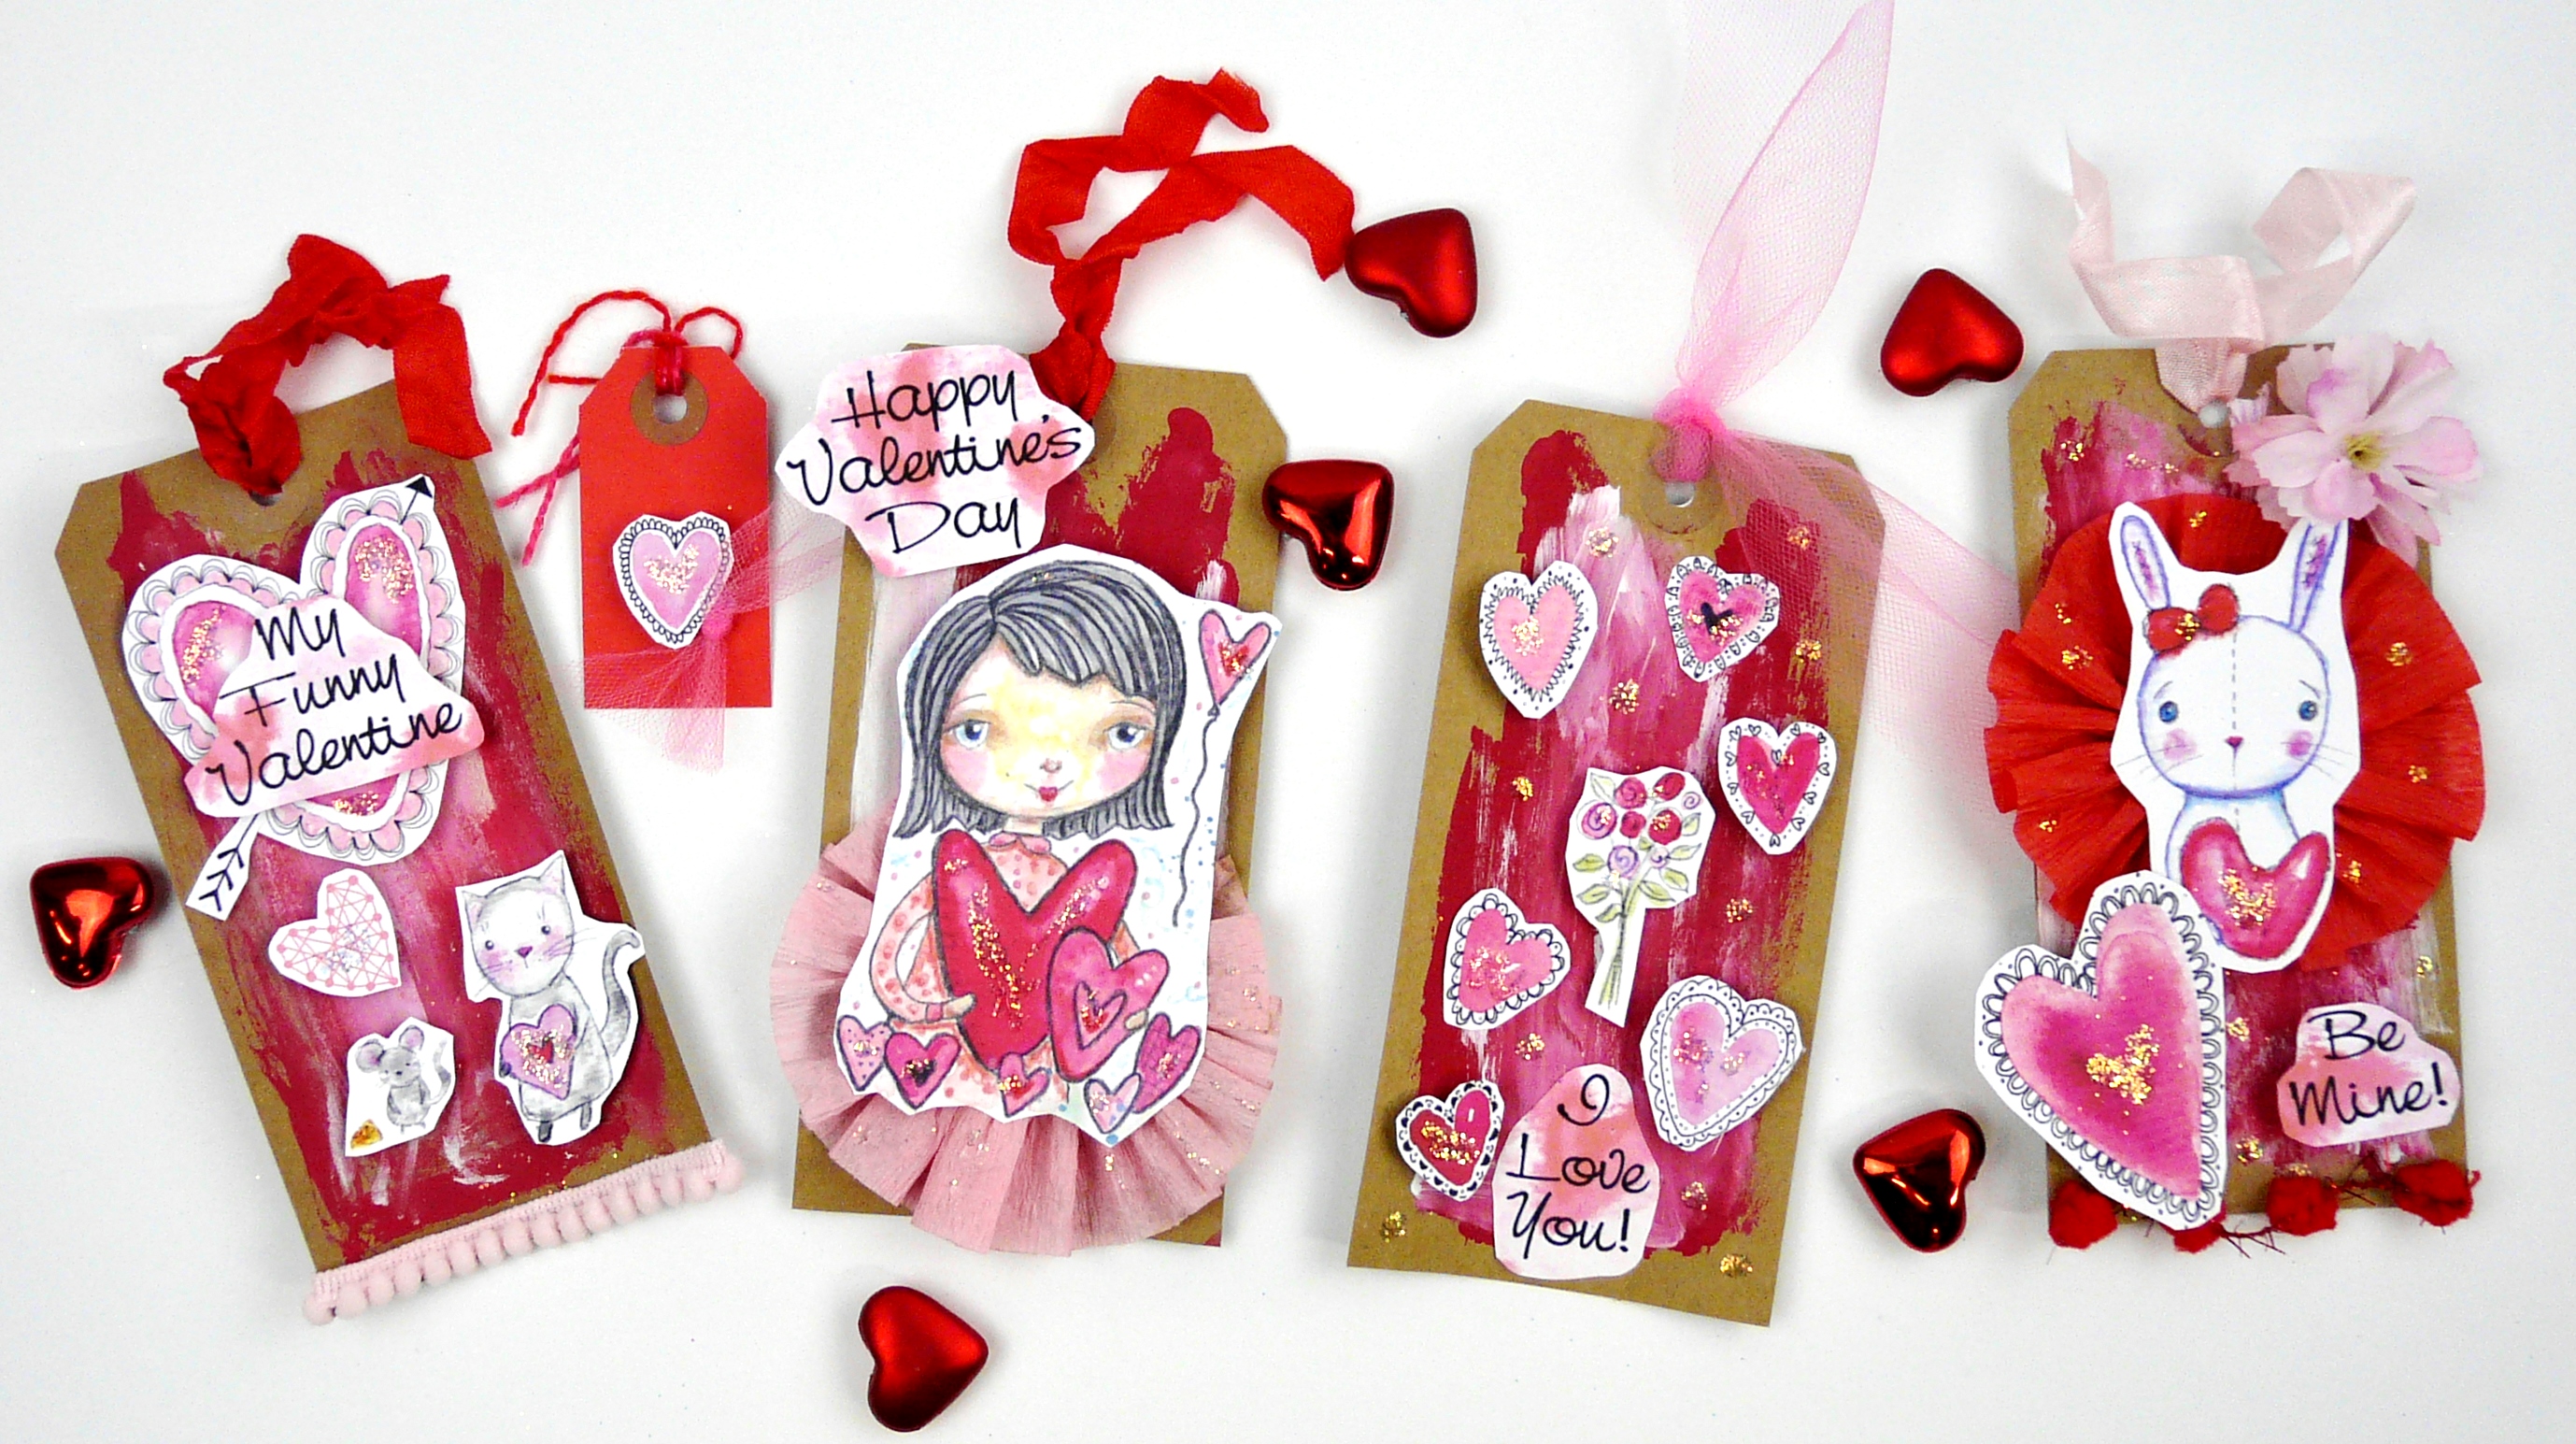
Happy Valentine's day.... I made these tags using my collage sheets.
These 2 collage sheets are perfect to create your Valentine home decor, use to create tags, journaling, valentines, art for your planner and more ....they are just plain fun!
These 2 collage sheets are perfect to create your Valentine home decor, use to create tags, journaling, valentines, art for your planner and more ....they are just plain fun!

I drew and painted the art...all are watercolored or acrylics. The first sheet has a white bunny, black haired girl, cat, mouse, lots of hearts and more. The second sheet are my sayings with a background of watercolored hearts. Some of the 15 sayings are: happy valentine's day. be mine, best friends, I love us, I'm smitten kitten, love like cray, love conquers all, and more!
Just print when you need them...over and over.

I made tags: Just paint store bought tags with acrylic paint (pink and red), cut out images on collage sheet. Hot glue in place. For extra height for images ...cut tiny scraps of card board and glue onto to the back of images... and then glue onto tags. Add ribbons, flowers, scraps of party streamers, trims, tulle, ribbons and more.
I glittered mine with iridescent glitter.
I glittered mine with iridescent glitter.


These are made from my paintings.

This one has party streamer for a skirt.

Just paint some tags with desired colors and let dry.

I just sew down 13" length of party streamer on a long stitch.
Gather one side of the threads.

Pull together to make a rosette and hot glue down.
Take small scraps of card board and hot glue to the back of a collage sheet image and glue onto tags- this gives dimension and height.

For this one I added a rosette and some pom pom string and a fake pink flower along with images from the collage sheets.
They are so much fun to make.
---------------------------------------------

The very sad news is that my brother passed away from covid.
His wife passed away in December. He fought hard and was on a ventilator, but his body couldn't make it. He was 10 years older then me and now he is with mom. He was a business man and owner of a local magazine. He was my silly brother who always made me laugh.

Here he was as a child... he was always putting together fun things for us sisters to do.
I can't believe he is gone.
Stay safe everyone!


