

It's May day!
Wow, is this an amazing spring or what?
The birds, flowers and leaves on trees are so cheerful.
I have started planting my flower pots, clean my patio and I have done lots of yard work....great exercise!

--------------------------------------------------

I want you to consider joining my newsletter....because this blog site that I use is going to stop emailing new posts. I will still post and you can see it if you come here, but they are stopping the automatic email.
Plus...when you join my newsletter....you get a cool freebie every month like this one:

I wanted to share a little about how I make a design like this freebie.

First I draw in pencil a design like these flowers...just a sketch.

I then use a sharpie or Micron pen....to go over my sketch...sometimes improving it as I go along.

After the pen ink is dry....I erase the pencil lines gently.

It is ready to scan using my printer/scanner.

This is a picture of my scanner window. I usually crop the drawing down and adjust the brightness so the drawing stands out really well.

I use adobe illustrator to make the drawing perfect. It is a great program I pay for monthly. You can draw and do all kinds of things on it. There are classes on Youtube and Skillshare that can teach you everything if you are interested.
I put my drawing in and use the image trace tool...it makes it easy to fix flaws.

I smooth out the drawing using the smooth tool.

I draw a curved line to type on...

Then I typed May flowers...I can change it all that I want.
I drew a box around the design to finish it and made the box look like a stitched line.

I also add my name and date to make it complete.
-----------------------------------------------------------

It is full of goodies to celebrate this month and spring!
My daughter and I are collaborating on a fun MAY pack...that consists of:
My daughter and I are collaborating on a fun MAY pack...that consists of:
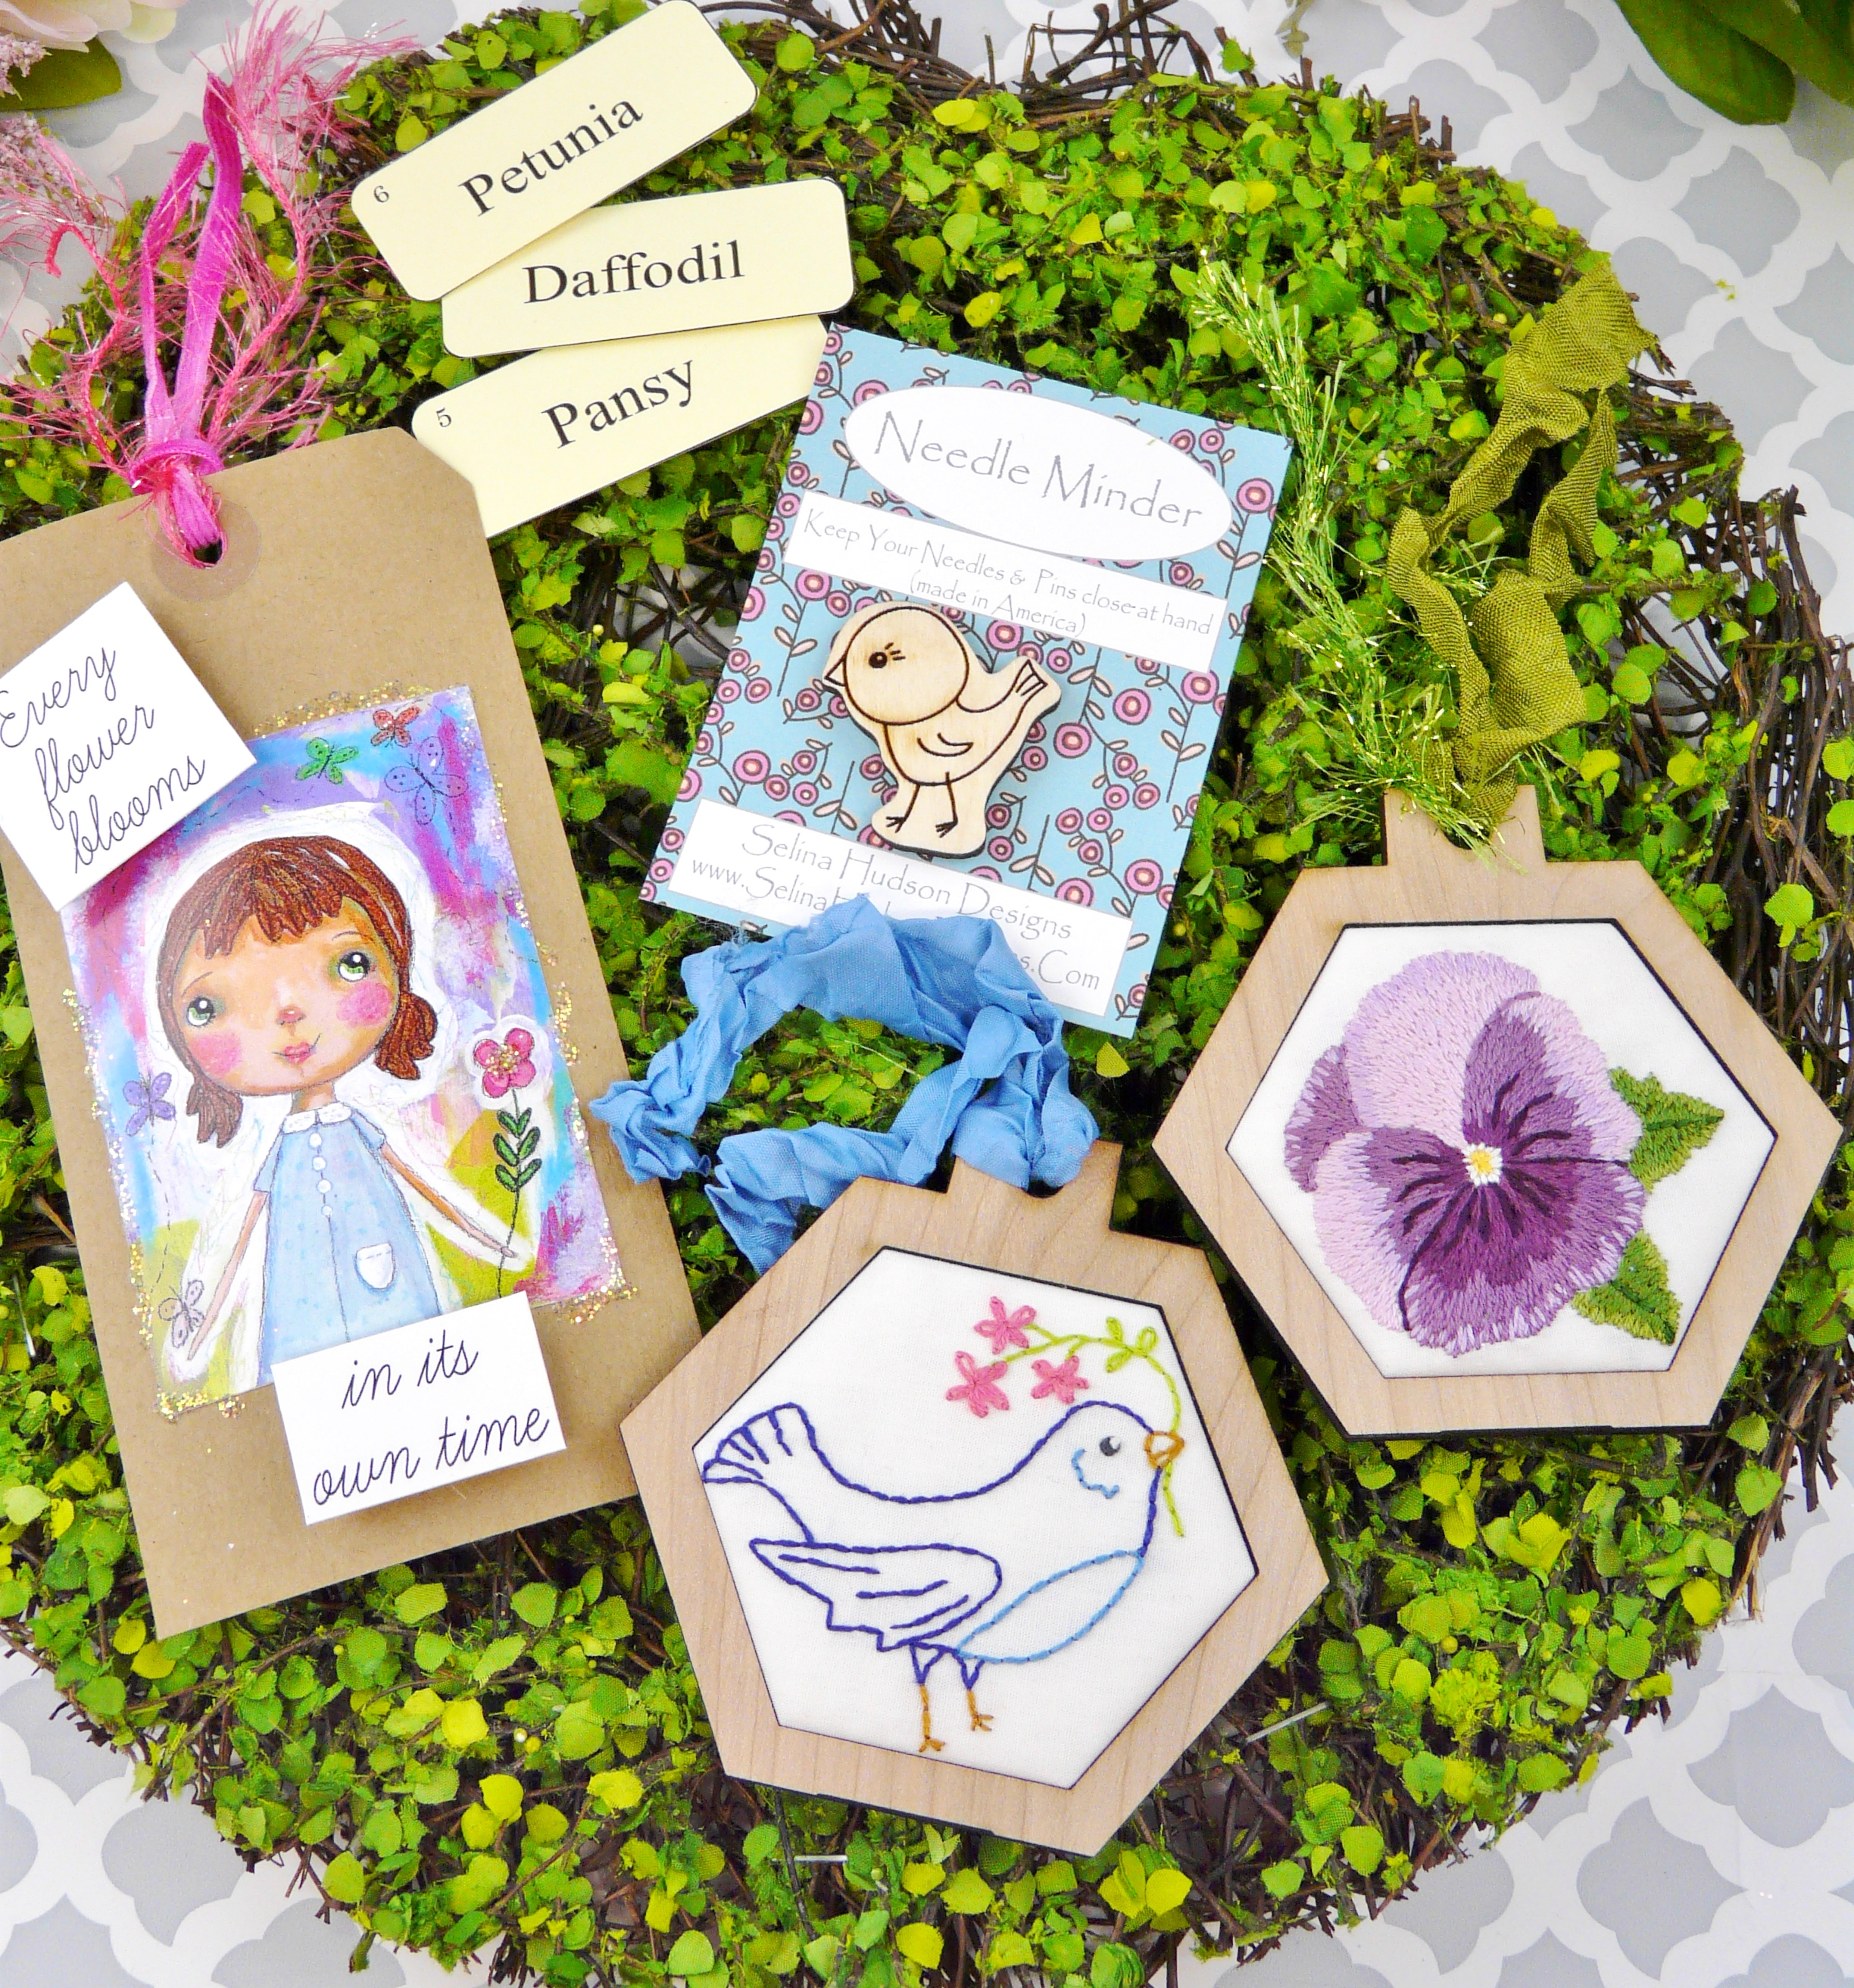
* 2 ornament Hexagons pack with THREAD PAINTING Pansy and little bird design/pattern....with full instructions (and thread painting details too), colors used for hand embroidery and green glitter string to use for hanging. (This is not the finished item...you create them with this pack)
Each one is 3 1/2" Tall and 3 3/4" Wide.... Then the inside (embroidery fits in here) 2 1/2" tall x 3".
Each ornament blank is plain wood but can be painted (watercolors work great!)
* 1 lil Birdie needle minder measuring: 1 3/8" x 1 3/8", made from wood, laser cut and has a very strong set of magnets to hold the needle minder in place on you embroidery hoop. It keeps your needles handy and it won't end up on the floor or couch.
* 1 Handmade art tag: Art (Girl with flower) made from one of my paintings...turned into a print with "Every flowers blooms in its own time" with glitter and a ribbon....tucked in a glassine bag. The tag measures: 3" wide x 6 `1/4" tall. It is signed and dated.
* plus a couple extra goodies.... a surprise!

This is the cover of the Hexie ornament pack.

There are detailed instructions and the pattern designs.

This little bird needle minder is so sweet!

This is the hand made tag you will get.

Plus some flower preemie flash cards.
--------------------------------------

This month I made a sweet deer mug rug...from these gorgeous pink and turquoise fabric.

How to do it?....I drew a quick diagram...below.

Use a 1/4" seam allowance. Sew the featured fabric next to 3 strips of deer fabric.
Press well. Sew 1" strips all the way around. It is a good idea for the fabric border strips to be the same as the backing fabric. It makes the strips resemble quilt binding. Cut excess fabric and press. Layer batting and backing fabric (slightly larger than top) then lay top over backing (right sides together). Pin in place. Sew 1/4" around mug rug leaving a 3" opening. Turn inside out. Sew opening closed. Quilt squiggles on featured fabric and also quilt down strips and around the borders.
----------------------------------------------------------

When my sister came to town...after not seeing her for 9 months...all of us sister (4) went shopping....finally....it was so much fun! We all have been vaccinated...but our state has a mask mandate....be it was like old times.
I got this cool old book.

The graphics are so amazing....I loved the Halloween section.

All the holidays are so cool.

It is a treasure... to find a book in such great condition.

I love paper products...like these stickers.

I had to have them since. Look at the fun hallloween owl.

I also got this raggedy Andy nut cup kit.

He is so adorable. I didn't add any nuts since it will make it oily.
-------------------------------------------------

This is a sneak peek for "June's Surprise pack"... available soon!
-------------------------------------------

Have a wonderful May!


